

A 50-card White/Blue wall of Blocker bodies and Repair units, built entirely from commons and uncommons, designed so Green's Breach damage never gets to trigger.
Some links below are affiliate links. If you buy through them, Geeky Domain may earn a small commission at no extra cost to you.
The Short Version
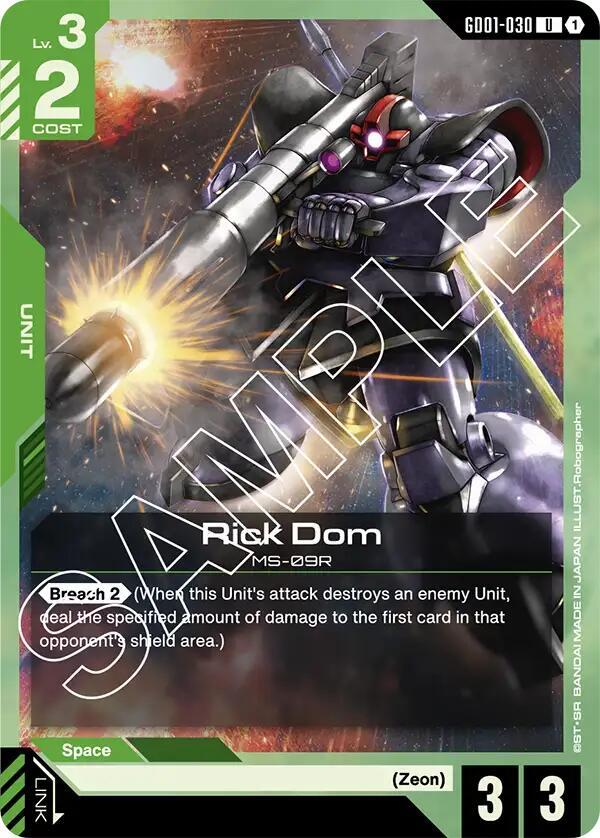
Breach only pays out when the attacking Unit's attack destroys one of your Units — Rick Dom (GD01-030) reads "When this Unit's attack destroys an enemy Unit, deal the specified amount of damage to the first card in that opponent's shield area." So Breach punishes bad blocks, not your existence, and a blocker that survives turns the keyword off entirely. Breach has 41 printings, and of the ones with a colour assigned roughly 60% are Green, so you nearly always know the colour you are up against. Your answer is White's Blocker (65 printings, the most common keyword in the game) on bodies with 4 HP rather than 1 or 2, backed by Blue's Repair (23 printings, 79% of the colour-assigned ones Blue). Below is a 50-card list of commons and uncommons, plus the block-or-decline math for every Green Breach threat in the pool.
In This Guide
- → What Breach Actually Does (And What It Doesn't)
- → The Real Problem: Breach Punishes Your Blocks
- → The Blockers That Actually Hold the Line
- → Repair Is How You Win the Long Game
- → The 50-Card Anti-Breach Decklist
- → Playing the Matchup: Block or Decline
- → Where This Deck Still Loses
- → Frequently Asked Questions
What Breach Actually Does (And What It Doesn't)
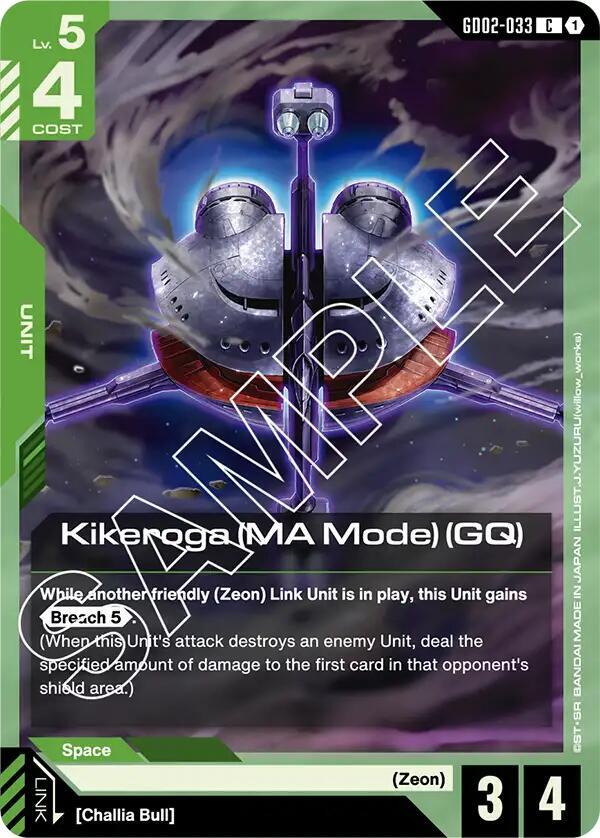
Most players lose this matchup because they misremember the keyword. Here is the reminder text as printed on Rick Dom (GD01-030), a 2-cost Zeon Unit at AP 3 and HP 3: "
Read the trigger again. It does not say "when this Unit attacks." It says when this Unit's attack destroys an enemy Unit. Breach only cashes in when something of yours dies in a battle they initiated. A Rick Dom that swings into an empty board and hits your shield area the normal way has Breached nothing; a Rick Dom that swings into a blocker and kills it has hit you twice in one attack. If you are still learning where the keyword line sits on the frame, the card anatomy guide covers it.
The keyword vocabulary here is small and completely knowable, a real advantage for a defensive player. There are seven: Blocker with 65 printings, Breach with 41, Repair with 23, First Strike with 16, High-Maneuver with 16, Suppression with 13, Support with 11. Breach is second most printed and roughly 60% of its colour-assigned printings are Green, so when someone leads on a Green resource you know most of what is coming. Our aggressive keyword breakdown covers how Breach, High-Maneuver and Suppression differ.
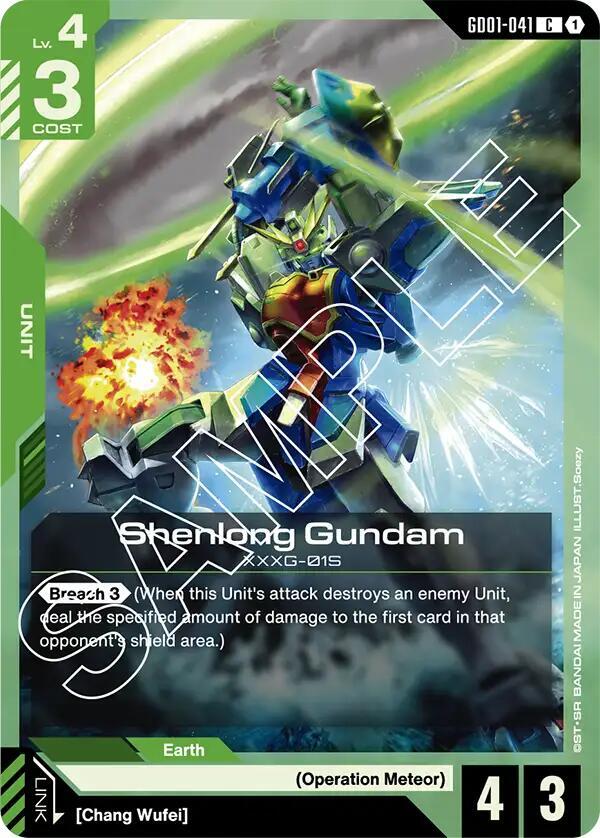
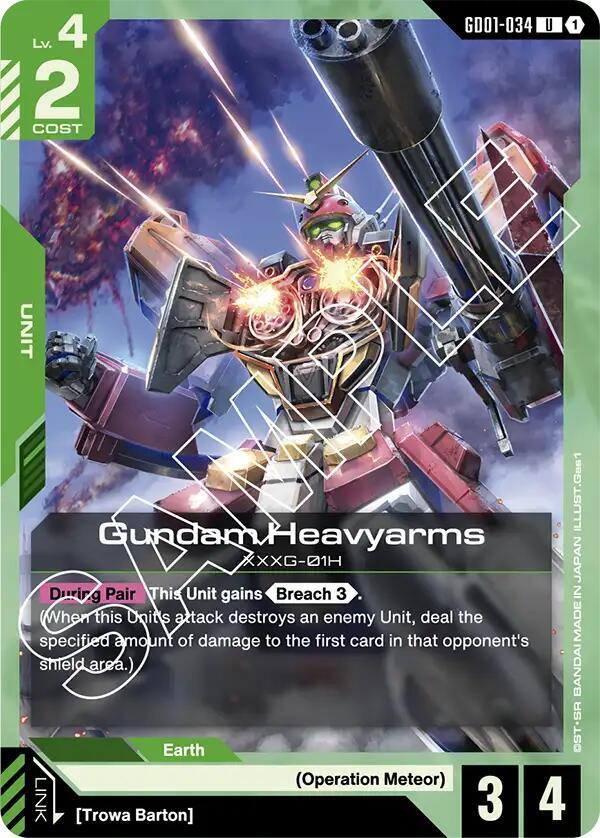
The numbers scale sharply. Rick Dom is only Breach 2. Shenlong Gundam (GD01-041), a 3-cost Operation Meteor Unit at AP 4 and HP 3, carries Breach 3. Gundam Heavyarms (GD01-034) is a 2-cost body at AP 3 and HP 4 reading "During Pair: This Unit gains
The Real Problem: Breach Punishes Your Blocks
Once you internalise the trigger, the matchup reframes itself. Green is not burning your shields down with Breach — Green is making you feel obligated to block, then charging a fee for it. Every time a body you threw in front of an attacker dies, you pay twice: once for the Unit, once for the shield damage. Let the attack through cleanly and Breach does nothing at all.
That does not mean you can decline forever, because your shield area is finite and the burst effects you get back are a consolation prize rather than a plan — shield management and burst triggers is worth a read if you have never budgeted shields as a resource. It means you block only when you are confident the blocker survives, and take clean damage on the turns where it would not. That is the opposite instinct to most first decks, where blocking feels free. Against Breach, a bad block is the most expensive play in the game.
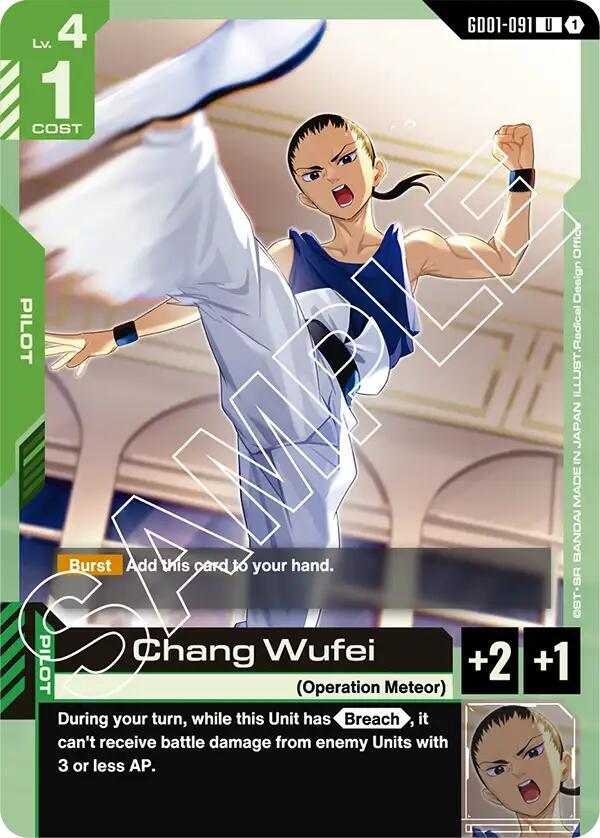
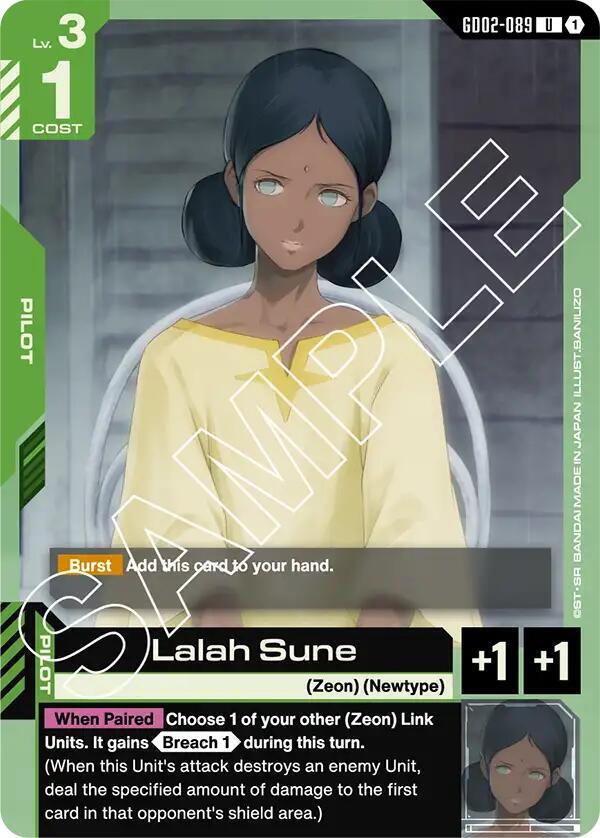
Green's Pilots exist specifically to make your blocks worse. Chang Wufei (GD01-091) is a 1-cost Pilot granting AP+2 and HP+1 whose text reads "During your turn, while this Unit has
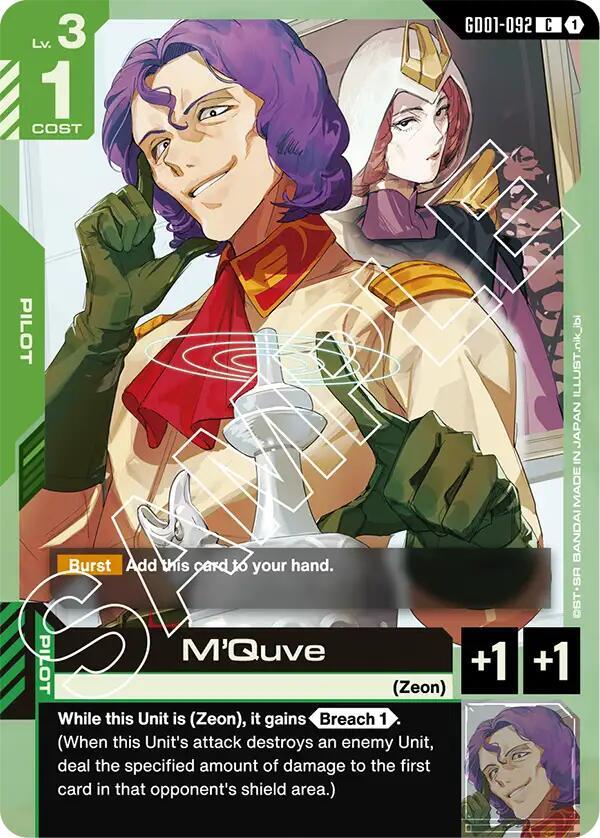
Then there is the cheap Breach-granting layer. M'Quve (GD01-092) is a 1-cost Zeon Pilot at AP+1 and HP+1 reading "While this Unit is (Zeon), it gains
One more piece of the Green kit matters, because it removes the safety of keeping your Units active. Duo's Leo (GD01-042) reads "This Unit may choose an active enemy Unit that is Lv.2 or lower as its attack target." Rasid's Maganac (GD01-043) grants a Green Unit the same licence against an active enemy with AP 4 or less, and Rasid's Orders (GD01-110) pushes that to AP 6 or less. If you have never mapped out how attacking, resting and target legality interact, the beginner rules walkthrough is the fastest fix.
The Blockers That Actually Hold the Line
Blocker reads "(Rest this Unit to change the attack target to it.)" It is the most printed keyword in the game at 65 printings, and White owns the plurality — 23 of White's 44 keyword instances are Blocker, roughly 52%. That is why the anti-Breach deck is White-primary. But access to Blocker is not the point. HP is the point. Against a keyword that only triggers on destruction, the gap between a 2 HP blocker and a 4 HP blocker is the gap between paying the Breach tax every turn and never paying it at all.
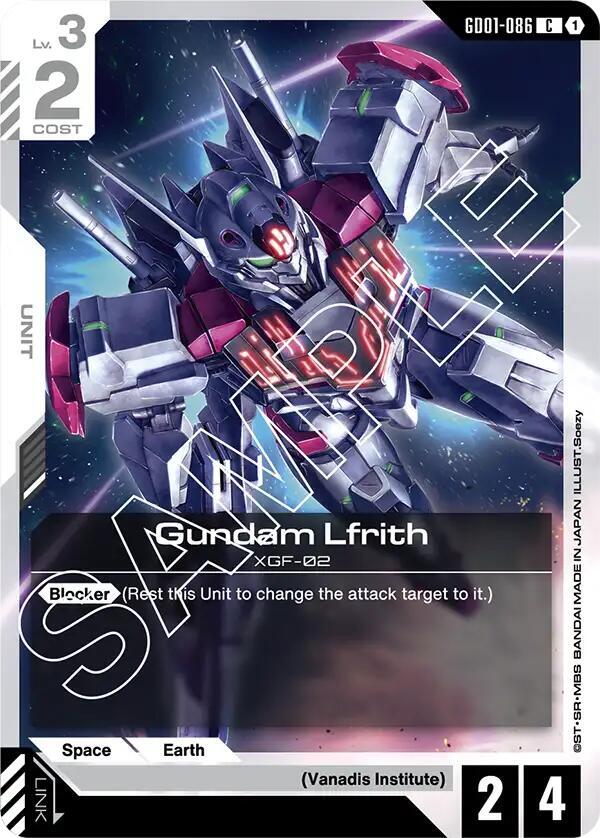
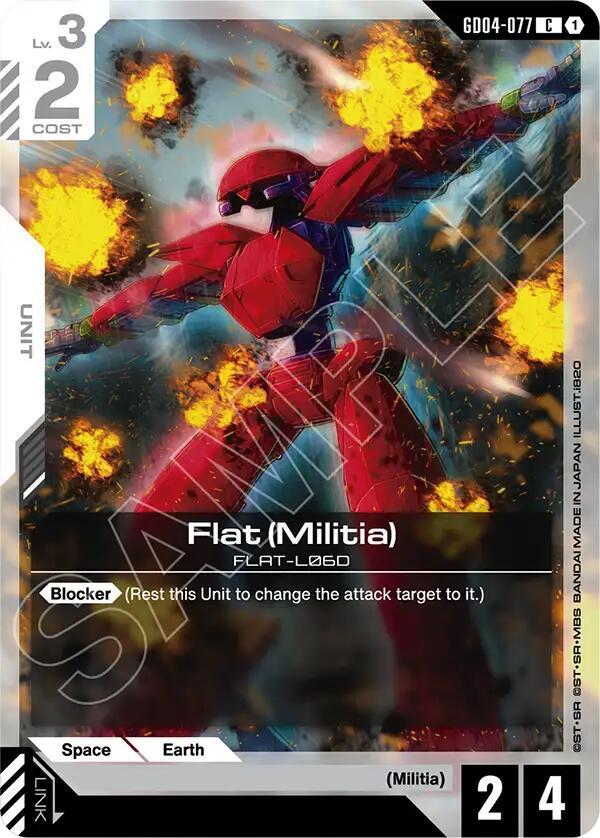
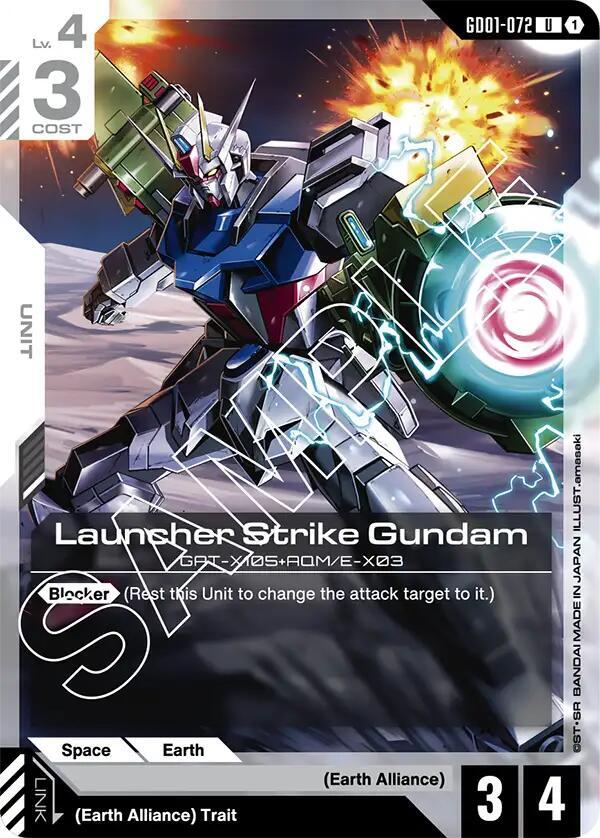
Two commons carry the deck. Gundam Lfrith (GD01-086) is a 2-cost Vanadis Institute Unit at AP 2 and HP 4 with printed Blocker, and Flat (Militia) (GD04-077) is the identical statline in Militia colours. Neither will ever kill anything meaningful, and that is fine. Put one in front of Rick Dom's AP 3 and it survives at 1 HP while dealing 2 back: no destruction, no Breach 2, no shield loss. You did not win the battle, you refused to lose it, which here is the same result. Launcher Strike Gundam (GD01-072) is the 3-cost version at AP 3 and HP 4, and it trades up rather than merely absorbing.
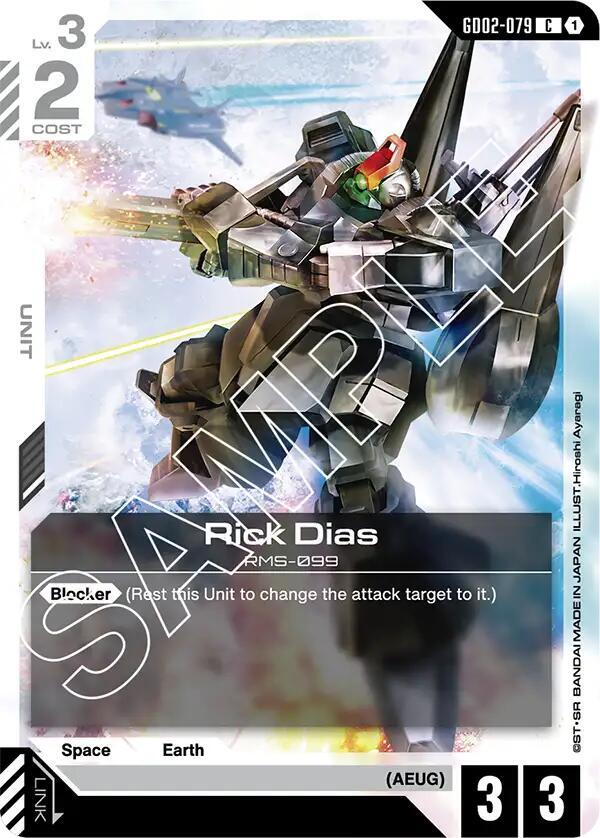
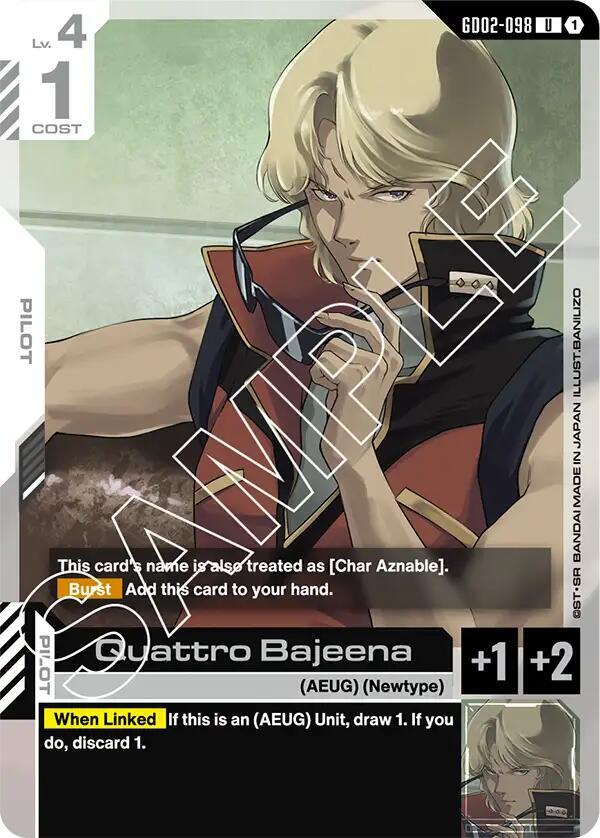
The best wall in the pool is a two-card package. Rick Dias (GD02-079) is a 2-cost AEUG Unit at AP 3 and HP 3 with printed Blocker, which alone dies to Rick Dom in an even trade — exactly the outcome you are avoiding. Pair it with Quattro Bajeena (GD02-098), a 1-cost AEUG Newtype Pilot granting AP+1 and HP+2, and you get an AP 4, HP 5 blocker. That body eats Shenlong Gundam's AP 4, survives at 1 HP, and deals 4 back into a 3 HP attacker to kill it outright. It also clears Chang Wufei's threshold, since AP 4 is above "3 or less." Both cards share the AEUG trait, so it is a genuine Link and Quattro's "When Linked: If this is an (AEUG) Unit, draw 1. If you do, discard 1" fires as a filtering bonus on top.
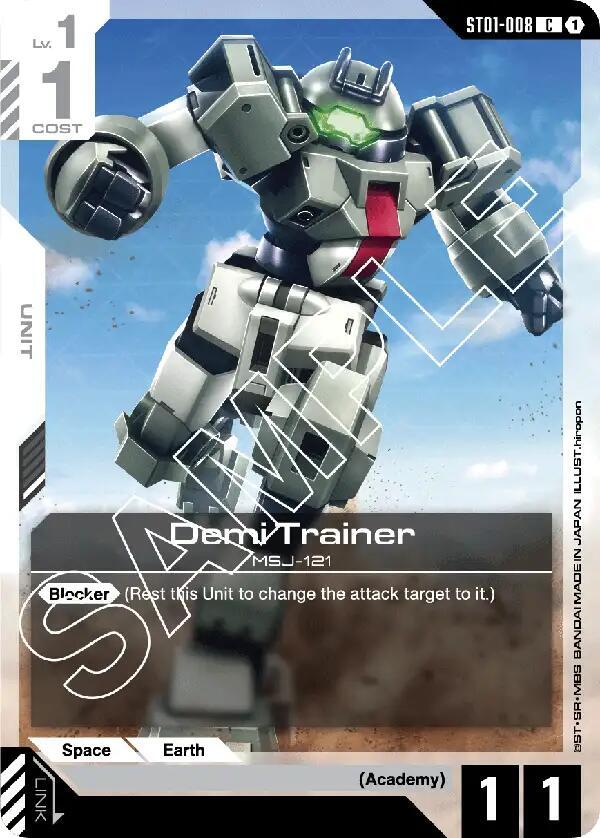
Now the cards you should deliberately leave out, which matters more here than in almost any other matchup. Demi Trainer (ST01-008) is a 1-cost Blocker at AP 1 and HP 1. Zowort (ST01-009) and Royal Gundam (GD05-075) are 2-cost Blockers at AP 3 and HP 2. Gun EZ (GD05-013) is a 2-cost Blocker at AP 2 and HP 1. Elsewhere these are reasonable speed bumps. Against Breach they are a gift: every one dies to a single AP 3 attack, and each death hands the attacker its Breach damage. A chump block against a Breach deck is not a delay, it is a two-for-one in their favour. Cut them. The Blocker keyword deep dive covers the resting cost in general, and the combat math primer covers the AP-versus-HP arithmetic you will be doing every turn here.
Repair Is How You Win the Long Game
Blocker keeps you alive a turn. Repair stops chip damage accumulating into a loss. The reminder text is "(At the end of your turn, this Unit recovers the specified number of HP.)" There are 23 Repair printings and 15 of the 19 colour-assigned ones are Blue — about 79% — which makes Blue the obvious second colour. The two-colour deckbuilding guide explains how the separate resource deck changes that calculus.
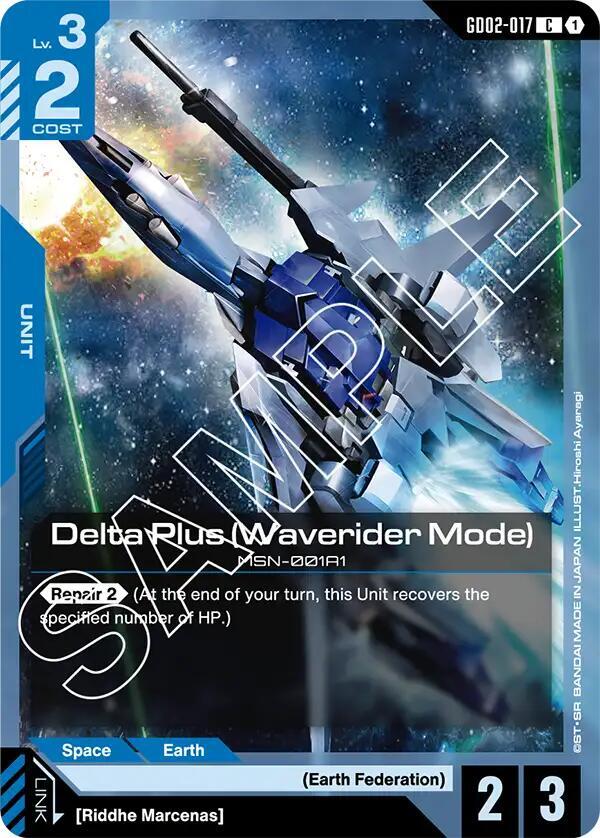
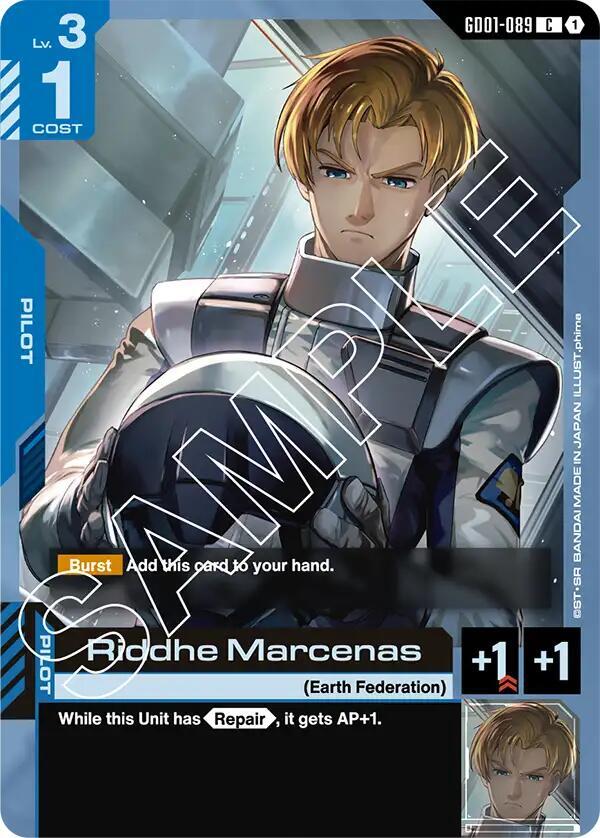
The engine card is Delta Plus (Waverider Mode) (GD02-017), a 2-cost Earth Federation Unit at AP 2 and HP 3 with Repair 2. Bare, it is fragile — Rick Dom's AP 3 kills it and collects Breach 2 — so you should almost never block with an unpiloted one. Pair it with Riddhe Marcenas (GD01-089), a 1-cost Earth Federation Pilot granting AP+1 and HP+1 whose text reads "While this Unit has
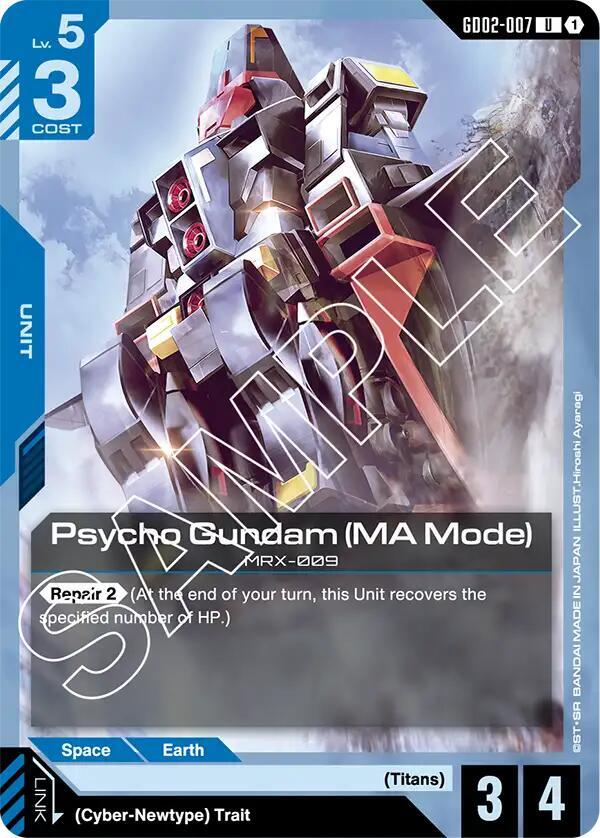
Be honest about the timing, because it is the thing new players get wrong here. Repair triggers at the end of your turn, not at the end of every turn. Block on their turn and drop to 1 HP, and you sit at 1 HP through the rest of their turn, recovering only after you have taken your own. That gap is why Psycho Gundam (MA Mode) (GD02-007) earns slots: a 3-cost Titans Unit at AP 3 and HP 4 with Repair 2, it has enough raw HP that the gap rarely kills it. The trade-off is that it is printed at Lv.5, which puts it outside some of your own healing.
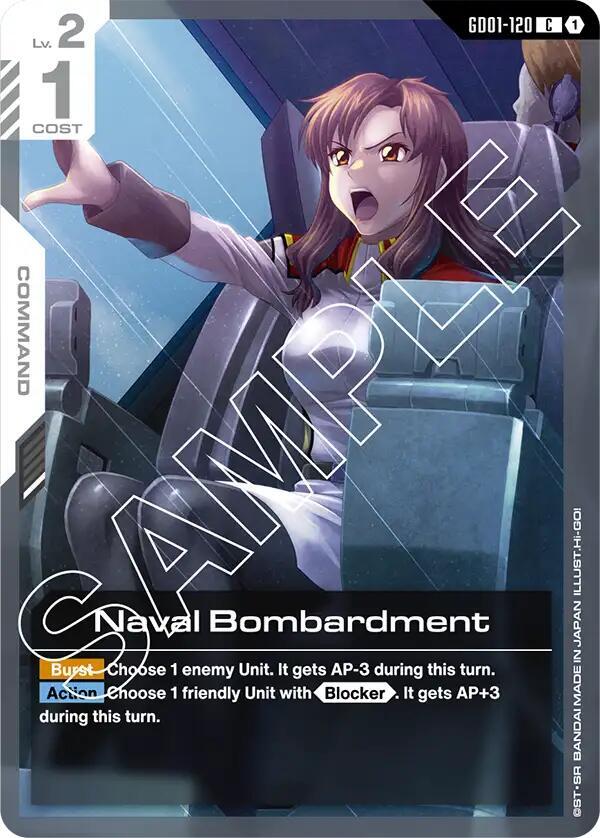
The support package is where a pile of walls becomes a deck. Naval Bombardment (GD01-120) is a 1-cost White common doing two jobs: "Burst: Choose 1 enemy Unit. It gets AP-3 during this turn. Action: Choose 1 friendly Unit with
The 50-Card Anti-Breach Decklist
This is a 50-card main deck, White and Blue, maximum four copies of anything, and it does not include the separate 10-card resource deck you build alongside it. Every card is a common or an uncommon — the point of the list is that you can answer Green aggression without touching a chase card. The rarity guide covers why rarity and playability diverge so sharply here, and the EX Base and EX Resource explainer covers the free resources that make this curve work.
| Card | Code | Cost | Copies | Role |
|---|---|---|---|---|
| Gundam Lfrith | GD01-086 | 2 | 4 | AP 2 / HP 4 Blocker. Survives every AP 3 attacker. |
| Flat (Militia) | GD04-077 | 2 | 4 | AP 2 / HP 4 Blocker. Copies 5 to 8 of the wall. |
| Rick Dias | GD02-079 | 2 | 4 | AP 3 / HP 3 Blocker. Link target for Quattro. |
| Launcher Strike Gundam | GD01-072 | 3 | 4 | AP 3 / HP 4 Blocker that also kills things. |
| Delta Plus (Waverider Mode) | GD02-017 | 2 | 4 | Repair 2 engine. Block with it only once piloted. |
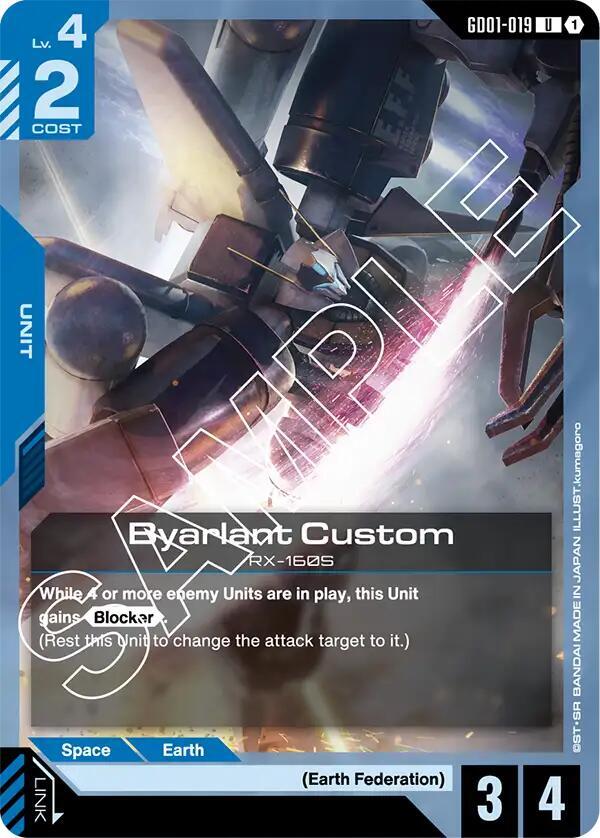
| Byarlant Custom | GD01-019 | 2 | 3 | AP 3 / HP 4 for 2. Blocker once they have 4 Units. |
| Psycho Gundam (MA Mode) | GD02-007 | 3 | 3 | AP 3 / HP 4, Repair 2. Your win condition. |
| Quattro Bajeena | GD02-098 | 1 | 4 | Pilot. AP+1 / HP+2 makes Rick Dias a 4/5 Blocker. |
| Riddhe Marcenas | GD01-089 | 1 | 4 | Pilot. AP+1 / HP+1, plus AP+1 on a Repair Unit. |
| Naval Bombardment | GD01-120 | 1 | 4 | Command. AP-3 as a Burst, AP+3 on a Blocker as an Action. |
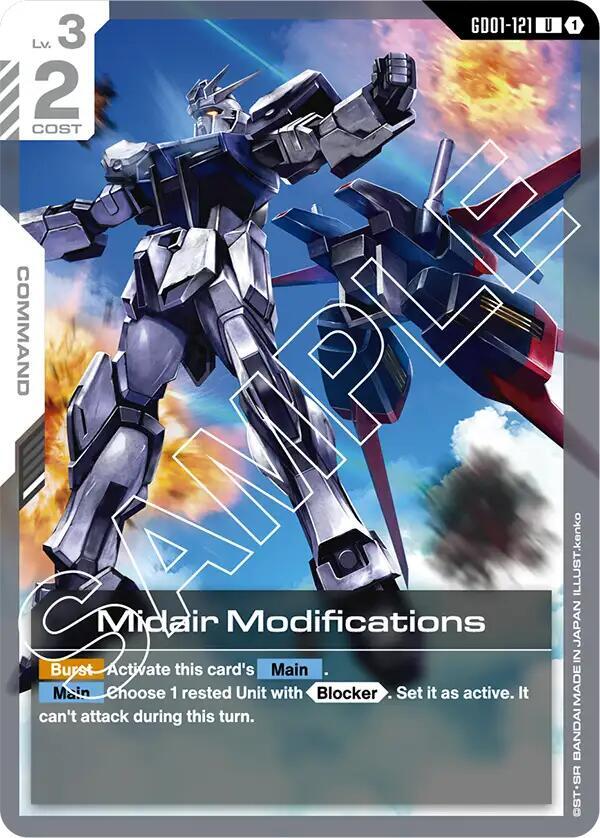
| Midair Modifications | GD01-121 | 2 | 3 | Command. Re-ready a Blocker for a second block. |
| Exclusively Defense-Oriented Policy | GD05-105 | 1 | 3 | Command. Bounces a Lv.3-or-lower attacker. |
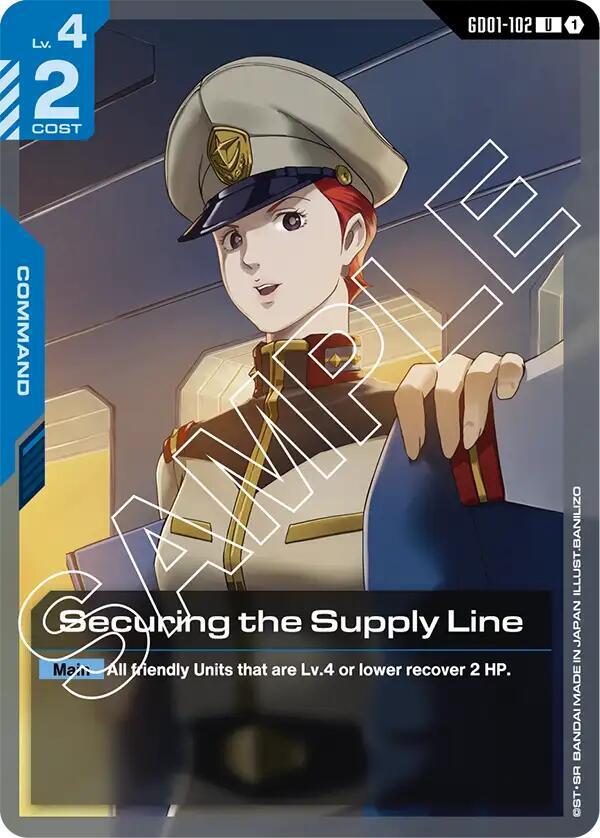
| Securing the Supply Line | GD01-102 | 2 | 2 | Command. Board-wide 2 HP heal, Lv.4 or lower. |
| Dominion | GD02-121 | 1 | 2 | Base, HP 5. Adds a Shield to hand, heals a blue Unit 2. |
| Side 7 | GD01-124 | 1 | 2 | Base, HP 4. Rest to heal any friendly Unit 1 HP. |
| Total | — | — | 50 | 26 Units, 8 Pilots, 12 Commands, 4 Bases |
The curve is deliberately flat and tops out at 3, because a card you cannot deploy until turn five does not block on turn three. Nineteen cards cost 1, twenty-four cost 2 and seven cost 3. The colour split is 27 White to 23 Blue, so your resource deck should lean White while guaranteeing early Blue for Delta Plus and Riddhe Marcenas. If you are building rather than netdecking, building your first deck covers the ratios in general terms.
Two swaps worth knowing. This list is light on card draw — Quattro Bajeena's Link filtering and the "Add 1 of your Shields to your hand" clause on both Bases are all of it. If you are top-decking blanks by turn six, cut the two Securing the Supply Line for two Overflowing Affection (GD01-118), a 1-cost White Command reading "Main: Draw 2. Then, discard 1." And if your local Green decks lean on AP 4 and AP 5 attackers, cut a Byarlant Custom and a Psycho Gundam for two Unforeseen Incident (ST01-014): "Burst: Activate this card's Main. Main/Action: Choose 1 enemy Unit. It gets AP-3 during this turn."
Playing the Matchup: Block or Decline
Every turn against a Breach deck reduces to one question: does my blocker survive? If yes, block. If no, take the hit and keep the Unit. The table below is the whole decision tree. Treat the AP figures as pre-Pilot baselines — assume anything they have committed a Pilot to is 1 to 2 AP higher than printed.
| Their Threat | Cost / AP / HP | Breach | Your Play |
|---|---|---|---|
| Rick Dom (GD01-030) | 2 / 3 / 3 | 2 | Block freely. Lfrith or Flat survives at 1 HP. |
| Gundam Heavyarms (GD01-034) | 2 / 3 / 4 | 3 when paired | Block with a 4 HP body. Neither of you dies. |
| Shenlong Gundam (GD01-041) | 3 / 4 / 3 | 3 | Block only with Rick Dias plus Quattro, or after AP-3. |
| Kikeroga (MA Mode) (GQ) (GD02-033) | 4 / 3 / 4 | 5 conditionally | Blockable at AP 3, but never let it destroy anything. |
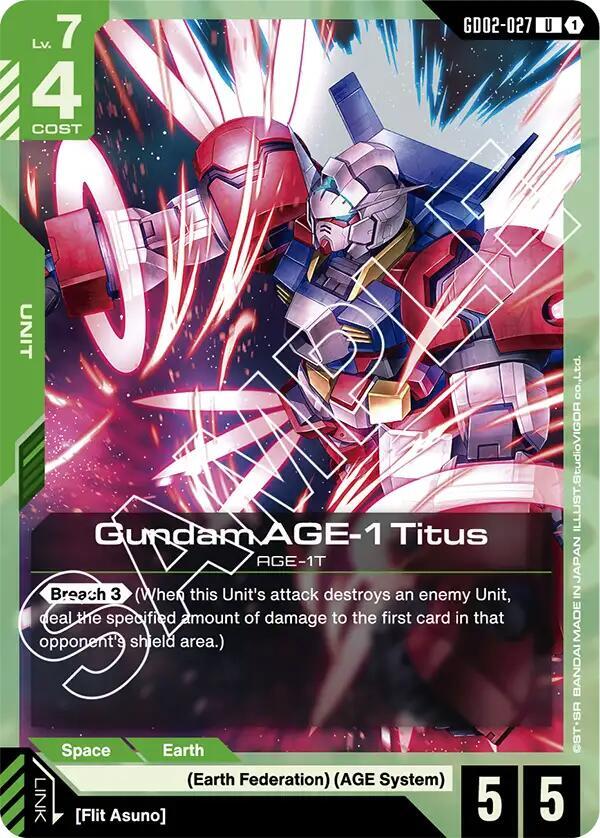
| Gundam AGE-1 Titus (GD02-027) | 4 / 5 / 5 | 3 | Do not block at full AP. Reduce it, or take the hit. |
Early turns are simple. Deploy Gundam Lfrith or Flat (Militia) on turn two and leave them active. A newly deployed Unit generally cannot attack the turn it arrives, and Michaelis (GD05-030) is printed specifically to break that rule against a rested target — so a Rick Dom landing on their turn two threatens on turn three, giving you one clear turn to wall it.
The middle turns decide the game. Your instinct will be to start attacking with the AP 4 Rick Dias package once you feel stable. Resist it. Hold Naval Bombardment up whenever you have a spare resource — the Action half, "Choose 1 friendly Unit with
Late, you stop being a wall and start being a grind. Psycho Gundam (MA Mode) recovering 2 HP a turn, Side 7 (GD01-124) resting to heal another point, Dominion (GD02-121) topping up a blue Unit and adding a shield to your hand — their attacks stop generating value while yours accumulate. Green aggression in this pool has very little reach past the board, so once your blockers reliably survive, they run out of ways to threaten you. For what else you will meet at a local event, the beginner's meta overview maps the common archetypes.
Where This Deck Still Loses
A guide claiming a budget list beats everything is lying to you. Here is where this one genuinely falls over, and none of these holes patch from a commons-and-uncommons pool.
Gundam AGE-1 Titus at AP 5 and HP 5 has no clean answer here. Exclusively Defense-Oriented Policy only bounces Lv.3 or lower and Titus is printed well above that, and nothing in this list blocks AP 5 and lives without help. The honest play is to take shield damage from it and win elsewhere, which works because Titus costs 4 while this deck is fully deployed by turn three. Kikeroga (MA Mode) is awkward differently — its Breach 5 only switches on "While another friendly (Zeon) Link Unit is in play," so the counterplay is board management rather than a card you can draw.
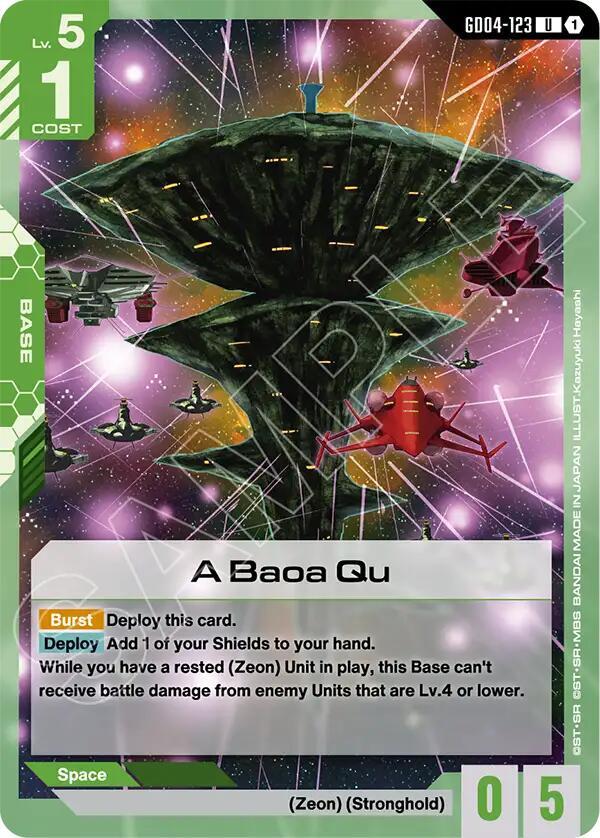
On offence you are slow and easily walled. A Baoa Qu (GD04-123) is a 1-cost Green Base reading "While you have a rested (Zeon) Unit in play, this Base can't receive battle damage from enemy Units that are Lv.4 or lower." Every attacker in this deck is printed at Lv.4 or lower except Psycho Gundam, so against a Zeon build with that Base down your clock more or less stops. Green's High-Maneuver access is the other one: Lauda Neill (GD05-087) reads "While this Unit is (Academy), it gains
Finally, be realistic about what this is: a commons-and-uncommons deck aimed at one style of opponent, with minimal card draw, no removal that kills anything outright, and a top end of 3 cost. Against a well-built control deck with real card advantage it runs out of gas. Against Green Breach aggression it is very good, and that was the assignment. Every card is a cheap single — the product buyer's guide covers which boxes are worth opening versus which cards to just buy outright.
Frequently Asked Questions
If I never block, does Breach ever trigger? No. The trigger is "when this Unit's attack destroys an enemy Unit," so an attack that resolves against your shield area without killing anything produces no Breach damage. The catch is that declining every block means taking every attack on your shields, and your shield area runs out faster than their board does. Be selective: block what you survive, decline what you do not.
Is chump-blocking with a 1-cost Unit ever right here? Almost never. Demi Trainer (ST01-008) at AP 1 and HP 1 dies to anything, and its death is precisely the condition that pays out Breach. You lose a card and take shield damage anyway. The only exception is when the unblocked hit would be lethal, at which point the Breach is irrelevant.
Why not use First Strike blockers to kill attackers first? Because the reminder text does not allow it: "(While this Unit is attacking, it deals damage before the enemy Unit.)" First Strike is explicitly attacking-only and does nothing on defence. Support has a related problem — "(Rest this Unit. 1 other friendly Unit gets AP+X during this turn.)" costs you a Unit's active status, and a rested Unit cannot block. Support is also 89% Red, which does not fit a White/Blue shell. We break both down in the First Strike and Support guide.
What do I do about Chang Wufei? Chang Wufei (GD01-091) shuts off battle damage from Units with AP 3 or less while the piloted Unit has Breach, during their turn. Block with something at AP 4 or higher: Rick Dias plus Quattro Bajeena, Delta Plus plus Riddhe Marcenas, or any Blocker holding a Naval Bombardment pump. If you cannot reach AP 4, do not block — you would take damage for nothing and hand them the Breach if the blocker dies.
Should I just play Breach myself and race them? You can, and Green has the tools, but a Breach mirror comes down to who blocks worse, and a racing deck has no answer once the opponent simply stops blocking. The White/Blue wall wins by making their keyword text irrelevant, which is more reliable than out-speeding a deck built for speed.
Which single card matters most? Naval Bombardment (GD01-120). A 1-cost common that either strips AP 3 off an attacker as a Burst or adds AP 3 to a Blocker at Action speed, and both halves change whether a block is survivable. Midair Modifications (GD01-121) is second, because turning one Blocker into two intercepts is how a narrow board handles a wide one.
Do I need rares to make this work? No, and that is the point. Every card is a common or an uncommon. What you need is four copies each of the 4 HP blockers and the two Pilots — consistency matters more than power level in a deck whose job is to have a wall available every single turn.
Beat Breach By Refusing To Die, Not By Racing.
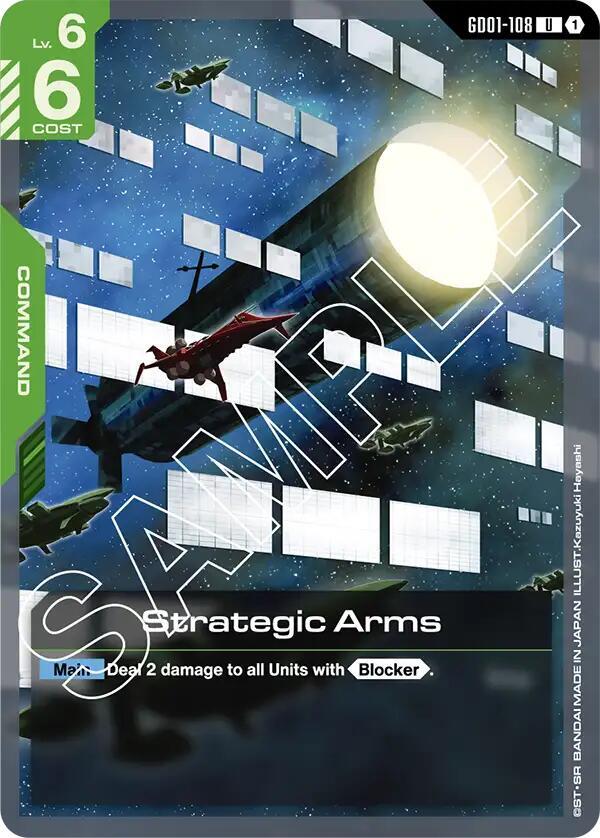
Breach only triggers when your Unit dies in battle, so the counter-strategy is a stack of 4 HP Blocker bodies and enough Repair to walk the chip damage back. Gundam Lfrith, Flat (Militia), Rick Dias plus Quattro Bajeena and a piloted Delta Plus give you a survivable block against every Green Breach attacker in this pool except Gundam AGE-1 Titus — and against that one, the right answer is to take the hit. It has real weaknesses to Strategic Arms and to genuine control decks, but as a targeted answer to Green aggression it does what it claims.
© GEEKYDOMAIN.COM | Strategy Powered by Data