

Fifty cards, every one of them a Common or an Uncommon: Red batteries rest to pump a single attacker while White Blockers eat everything coming back.
Some links below are affiliate links. If you buy through them, Geeky Domain may earn a small commission at no extra cost to you.
The Short Version
Red's signature keyword is Support, not raw aggression: rest one of your Units and a different friendly Unit gets AP+X for the turn. Eight of the nine Support cards in the game are Red (89%), and White owns Blocker with 23 of the 44 cards that carry it (52%). Put those together and you get a midrange deck, not a fast one: Abyss Gundam (GD05-040) and BuCUE (GD01-055) hand out AP+2 each so that Schuzrum-Galluss (GD04-040), a 2-cost AP4/HP3 Uncommon, swings as a 6-to-8 AP monster, while Gundam Lfrith (GD01-086) and Rick Dias (GD02-079) hold the ground for two resources apiece. The whole 50 is Commons and Uncommons, so the build costs pocket change. The honest caveat: Support is 【Activate・Main】, which means it only works on your own turn, and this deck has no card draw and no top end, so it wants the game over by around turn seven.
In This Guide
Red Is A Support Colour, Not An Aggro Colour
If you have read a Gundam Card Game deck primer that filed Red under "the fast colour with a keyword to match," check it against the printed cards. The complete keyword vocabulary in this game is seven words long — Blocker, Breach, Repair, First Strike, High-Maneuver, Suppression and Support — and across all 536 cards printed so far, nothing outside that list exists. Here is the whole vocabulary with the number of printings each keyword appears on, plus which colour actually owns it.
| Keyword | Printings | Who owns it |
|---|---|---|
| Blocker | 65 | White, 23 of 44 cards (52%) |
| Breach | 41 | Green, 21 of 35 cards (60%) |
| Repair | 23 | Blue, 15 of 19 cards (79%) |
| First Strike | 16 | Spread: Red 4, Green 3, White 3 |
| High-Maneuver | 16 | Spread: Green 4, Blue 3, Purple 3 |
| Suppression | 13 | Not represented in this budget pool |
| Support | 11 | Red, 8 of 9 cards (89%) |
Two numbers in that table are doing different jobs, so it is worth saying plainly: the printings column counts every version of every card, including alternate-art reprints, while the ownership column counts distinct cards. Blocker shows up on 65 printings but 44 different cards; Support shows up on 11 printings but only 9 different cards. Either way the pattern holds. Support is the most concentrated keyword in the game by colour, and that colour is Red. If you want the full mechanical breakdown of how these abilities resolve, we cover Support and its timing alongside First Strike in the First Strike and Support keyword guide, and Blocker gets its own treatment in the Blocker deep dive.
So what does Red actually feel like at the table? Its reminder text reads: Support X — Rest this Unit. 1 other friendly Unit gets AP+X during this turn. That is a colour that spends bodies to make one attack enormous. It is not a colour that floods the board and races you down in three turns. Combine it with White, whose reminder text reads Blocker — Rest this Unit to change the attack target to it, and you have a deck that survives the early game, then wins a single decisive combat every turn from about turn four onward. That is a midrange deck, and calling it anything else will make you play it wrong.
One more piece of orientation before the list. There are five colours in this game, not four: White, Blue, Green, Red and Purple, and Purple is a real 80-card colour, not a rumour. A legal deck is 50 cards in the main deck plus a separate 10-card resource deck, a maximum of four copies of any card, and no more than two colours. If any of that is new, start with the beginner's rules walkthrough before you sleeve this up.
How Support And Blocker Actually Combine
The deck runs three Support printings, and they are not interchangeable. ZuOOT (GD01-061) is a 1-cost Common with no AP at all and HP2, carrying Support 1. It cannot attack in any meaningful sense; it exists purely as a battery you deploy on turn one. BuCUE (GD01-055) is a 2-cost Uncommon, AP2/HP3, carrying Support 2. Abyss Gundam (GD05-040) is the best of the three: a 2-cost Uncommon with AP2/HP4 and Support 2, which means it hands out the same AP+2 as BuCUE while sitting on a body that survives most things that come at it.
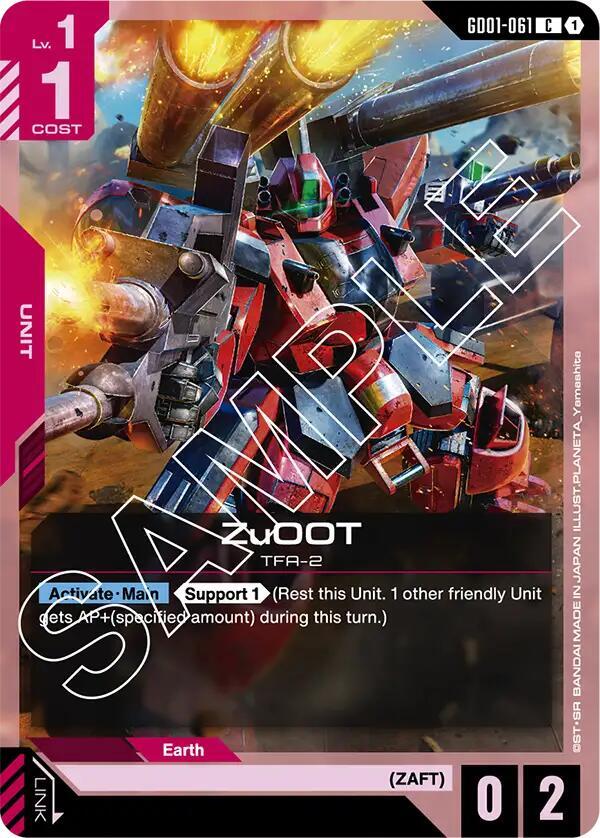
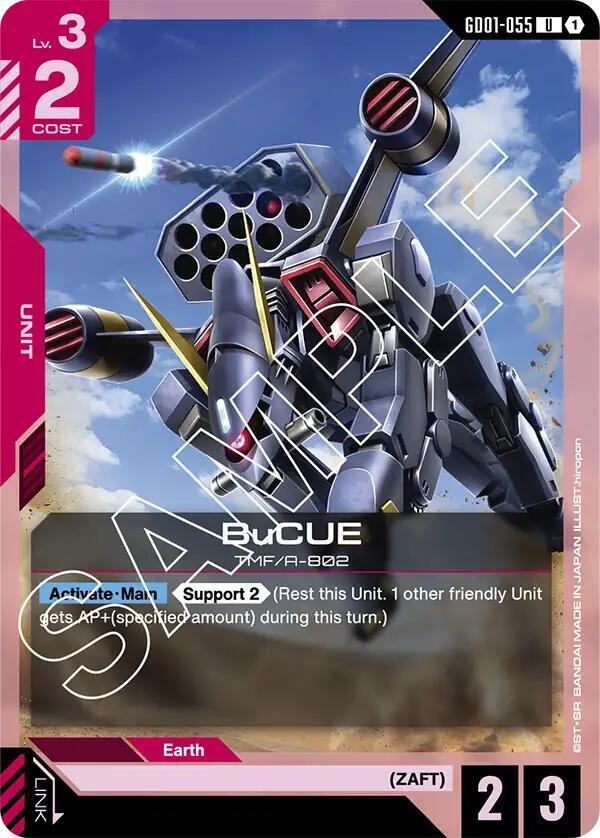
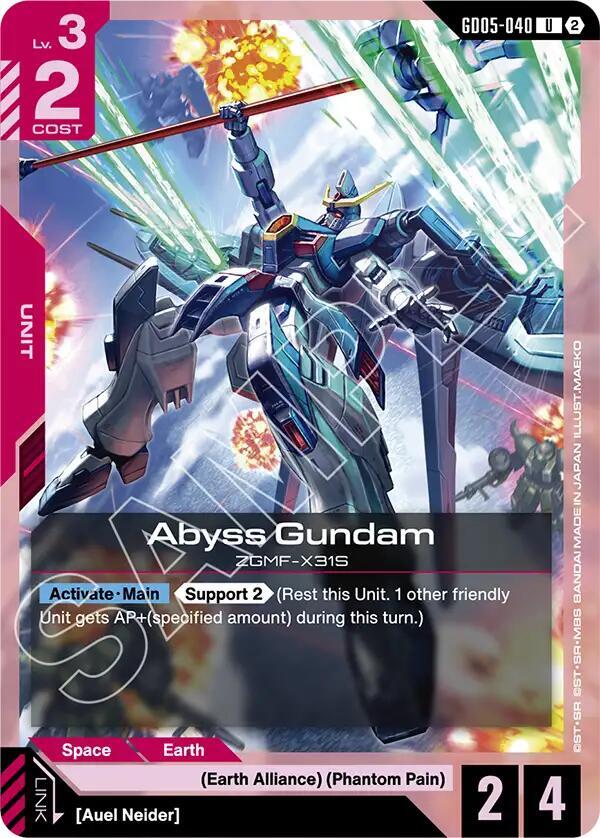
Here is the timing detail that decides how you build around them. Every Support ability in this pool is printed as 【Activate・Main】. That is a main-phase ability, and your main phase happens on your turn. You can rest BuCUE to make an attacker bigger before you declare an attack; you cannot rest it during your opponent's turn to save a Unit that is being attacked. The AP+2 also lasts "during this turn" and then evaporates. Support is an offensive tool and only an offensive tool, which is exactly why this deck pairs it with a colour that defends for free.
Now the second half. Blocker reads "Rest this Unit to change the attack target to it," so a Blocker has to be active to do its job, and blocking rests it. That matters because of a rule that catches new players constantly: your attacks can normally only be pointed at the enemy player or at a rested enemy Unit. An active Unit is not a legal target, which is precisely why a card like That One Looks A Lot Stronger? (GD02-108) has to spend a whole Command just to let one of your Units "choose an active enemy Unit as its attack target." The override tells you the default.
Stack those two facts and the whole deck falls out of them. When you rest ZuOOT for Support 1, you have not just spent an ability. You have turned that battery into a legal attack target for your opponent's next turn. When your Rick Dias blocks, it rests, and it is a target too. That is the tax on this strategy, and it is the reason Abyss Gundam with HP4 outclasses ZuOOT with HP2 despite costing one more resource: the HP4 battery survives being punished for doing its job. If you want to see how those attack and block decisions price out numerically, the combat math guide works through the AP-versus-HP exchanges in detail.
The 50-Card Budget Decklist
Every card here is a Common or an Uncommon. There is not a single Rare, Super Rare or alternate art in the list, which is the entire point: you should be able to assemble this from bulk singles and a starter deck. Twenty-three cards are Red, twenty-seven are White, and the curve tops out at three resources.
| Card | Code | Colour | Cost | Copies | Role |
|---|---|---|---|---|---|
| ZuOOT | GD01-061 | Red | 1 | 4 | Turn-one Support 1 battery, AP-/HP2 |
| BuCUE | GD01-055 | Red | 2 | 4 | Support 2 on an AP2/HP3 body |
| Abyss Gundam | GD05-040 | Red | 2 | 4 | Best battery: Support 2 on AP2/HP4 |
| Schuzrum-Galluss | GD04-040 | Red | 2 | 4 | Primary Support target, AP4/HP3 |
| Zeon Remnant Forces | GD01-115 | Red | 1 | 2 | Command: 1 damage, Main or Action |
| Assault on Torrington Base | GD01-114 | Red | 1 | 2 | Action-speed AP+1 to two Units |
| Mining Asteroid Palau | GD01-128 | Red | 1 | 3 | Base, HP6, Deploy adds a Shield to hand |
| Demi Trainer | ST01-008 | White | 1 | 2 | 1-cost Blocker, AP1/HP1 |
| Gundam Lfrith | GD01-086 | White | 2 | 4 | Blocker, AP2/HP4, the sturdiest wall |
| Rick Dias | GD02-079 | White | 2 | 4 | Blocker, AP3/HP3, best rate in the pool |
| Flat (Militia) | GD04-077 | White | 2 | 2 | Blocker, AP2/HP4, copies 5 and 6 of Lfrith |
| Buster Gundam | GD02-076 | White | 3 | 4 | AP4/HP3; Blocker switches on at 5 or more AP |
| Launcher Strike Gundam | GD01-072 | White | 3 | 2 | Blocker, AP3/HP4, top of the curve |
| Elan Ceres (Enhanced Person Number 4) | GD01-098 | White | 1 | 3 | Pilot, AP+2/HP+1, turns Buster on permanently |
| Quatre Raberba Winner | GD05-100 | White | 1 | 2 | Pilot, AP+2/HP+1, When Paired rests a Unit |
| Unforeseen Incident | ST01-014 | White | 1 | 2 | Burst plus Main/Action: enemy Unit AP-3 |
| Naval Bombardment | GD01-120 | White | 1 | 2 | Burst AP-3; Action: a Blocker gets AP+3 |
That is 34 Units, 5 Pilots, 8 Commands and 3 Bases, for 50 exactly. Twenty-two cards cost one resource and twenty-two cost two, which is why the deck functions on a low resource count and why it stops scaling later. Your 10-card resource deck is separate and does not count toward the 50; if you are unclear on how resources, EX Resources and the EX Base fit together, we unpacked that in the EX Base and EX Resource explainer. And if this is the first list you have ever built rather than copied, read it next to our two-colour deckbuilding guide, because a 23/27 colour split is deliberately close to even and that has consequences for how you sequence your resources.
The Cards That Carry The Deck
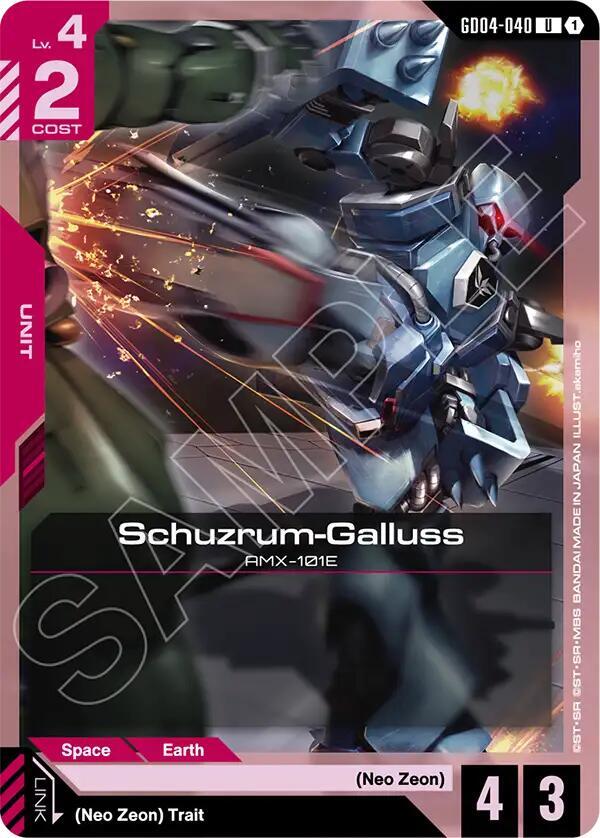
Schuzrum-Galluss (GD04-040) is the reason this deck exists. Two resources buys you a Red Uncommon with AP4 and HP3 and no drawback text at all — the printed effect line is a dash. Four AP for two resources is the best raw attack rate in the entire budget pool, and because it has no conditional clause to satisfy, it is always the correct target for a Support activation. BuCUE turns it into a 6 AP attacker. BuCUE plus Abyss Gundam turns it into an 8 AP attacker for zero additional resources, because Support costs nothing but the rest.
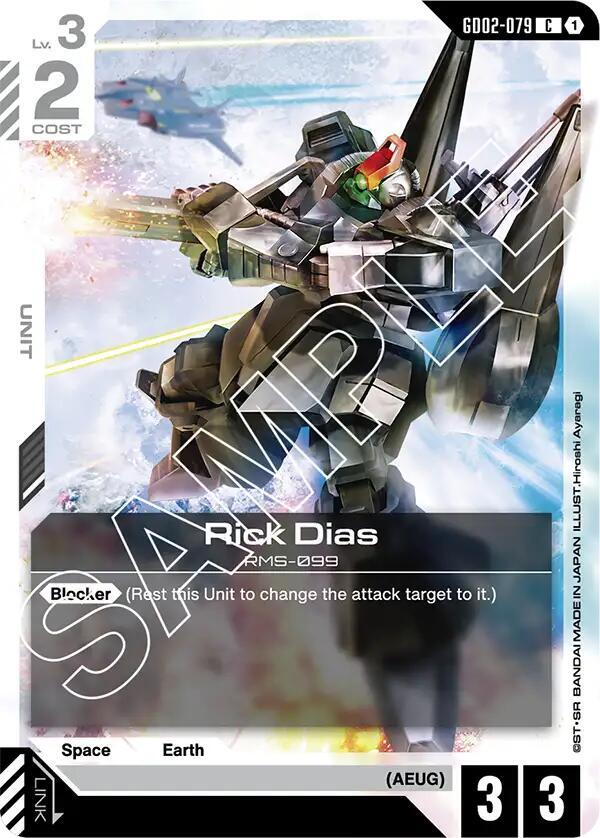
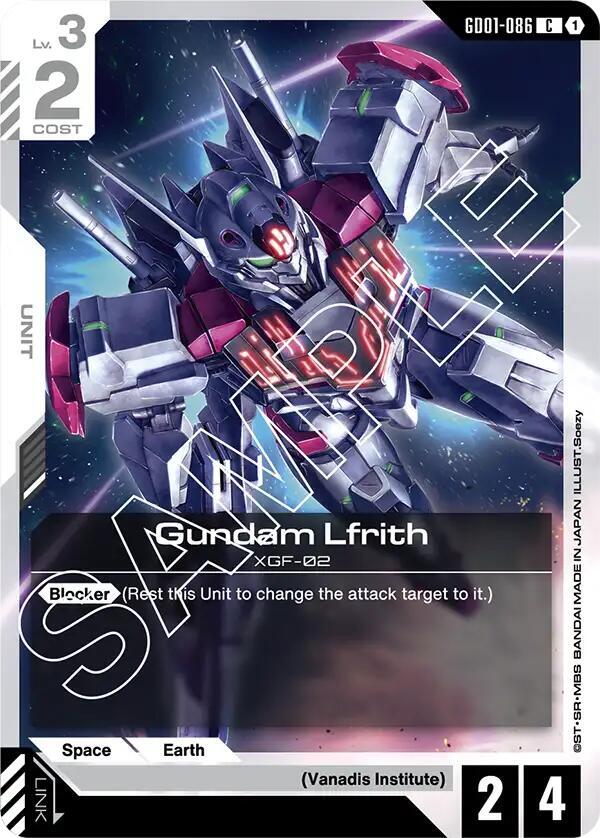
Rick Dias (GD02-079) is a 2-cost Common with AP3/HP3 and unconditional Blocker. No trait requirement, no "while you control another" clause, nothing to remember. It blocks the turn it can, and its AP3 body means anything that attacks into it takes three damage on the way through. Gundam Lfrith (GD01-086) is the same cost with AP2/HP4 and the same unconditional Blocker; you want both because they answer different attackers. Lfrith walls off the AP3 bodies that Rick Dias would trade with, and Rick Dias punishes the small ones. Flat (Militia) (GD04-077) is functionally a fifth and sixth Lfrith at AP2/HP4, which is why it is in the list at two copies rather than being cut.
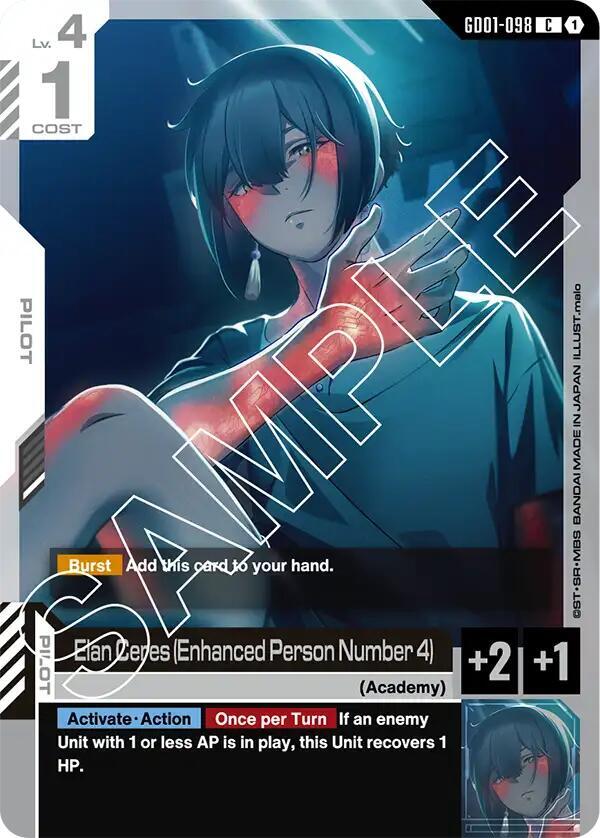
Buster Gundam (GD02-076) is the most interesting card in the deck and the easiest to misplay. It is a 3-cost Uncommon, AP4/HP3, and its Blocker is gated behind a clause: while this Unit has 5 or more AP, it gains Blocker. Your instinct will be to fix that with Support. Do not. Support is main-phase-only and its AP+2 expires at end of turn, so on your opponent's turn Buster is a plain AP4 body with no Blocker at all. The fix is a Pilot. Elan Ceres (Enhanced Person Number 4) (GD01-098) is a 1-cost Common Pilot granting AP+2/HP+1; pair it onto Buster and you have a permanent AP6/HP4 Blocker for four resources total, which is the single best defensive body you can assemble on this budget.
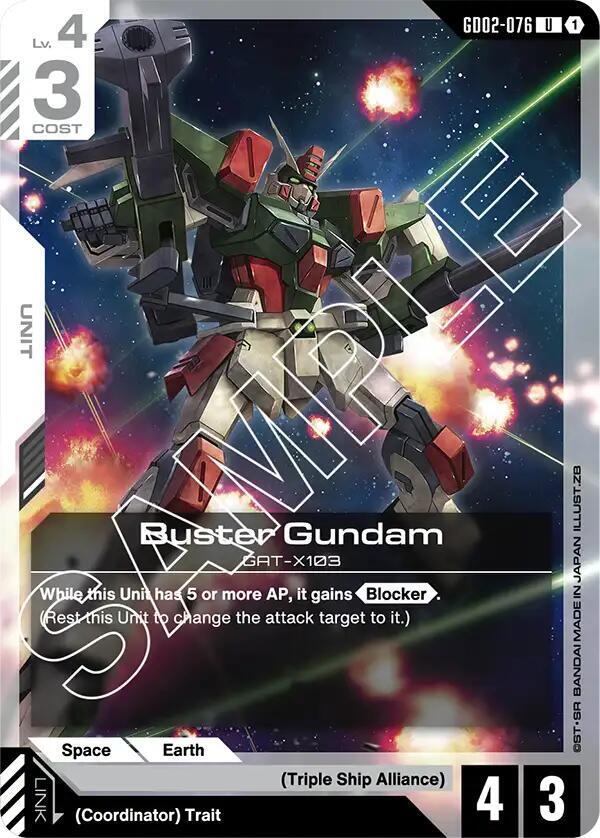
Quatre Raberba Winner (GD05-100) is the second Pilot and does double duty. Same AP+2/HP+1 rate, but its 【When Paired】 clause rests an enemy Unit. Resting an enemy Unit does two things at once: it strips a potential Blocker, and it makes that Unit a legal attack target, because rested Units are what you are allowed to attack. Pairing Quatre onto an attacker and then swinging at the Unit he just rested is the cleanest tempo line in the deck, and the reason this list can beat a board of Blockers without owning a premium removal Rare.
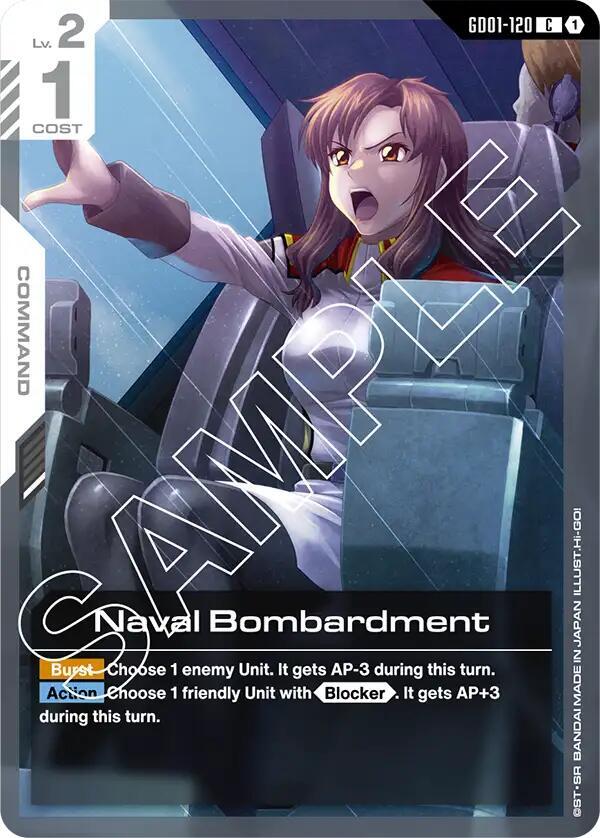
Naval Bombardment (GD01-120) rounds it out at one resource. Its 【Action】 gives a friendly Unit with Blocker AP+3, which is the only pump in the deck that works while your opponent is attacking you, and its 【Burst】 gives an enemy Unit AP-3 if it happens to be sitting in your shield area when a hit comes in. That Burst line is genuine value, and our shield management and Burst guide explains why loading your shields with Burst cards changes how an opponent is willing to attack you. Note the restriction: its Action needs a friendly Unit that already has Blocker, so it cannot switch Buster Gundam on either.
Playing It: Curve, Combat Math And Timing
Turn one you deploy a 1-cost card, and nine of them are worth playing on an empty board: four ZuOOT, two Demi Trainer and three Mining Asteroid Palau. ZuOOT is usually correct going first, because it is the battery you want online before the attackers arrive; Demi Trainer is correct when you are on the back foot, because a 1-cost Blocker absorbs an attack that would otherwise cost you a shield.
Turn two you have 22 two-drops to choose from and the choice is genuinely positional. Abyss Gundam if you want the AP4-plus turn coming next. Rick Dias or Gundam Lfrith if your opponent already has a threat down. Schuzrum-Galluss if the board is empty and you want to start pressuring shields immediately. Turn three is where the deck starts doing its thing: Buster Gundam plus a Pilot the turn after, or a two-drop plus a Pilot on an existing body, or Schuzrum-Galluss backed by ZuOOT for a 5 AP attack while you still hold a Blocker in reserve.
Now the arithmetic, because this is where honest deck guides differ from optimistic ones. Combat in this game is simultaneous by default: your attacker deals its AP to the defending Unit's HP and takes that Unit's AP as damage in return. So a Support-pumped Schuzrum-Galluss at 6 AP kills a Rick Dias with HP3 — but Rick Dias hits back for AP3, and Schuzrum-Galluss has HP3, so it dies too. Adding a second Support to reach 8 AP does not change that outcome one bit. Overkill AP is wasted; the counter-damage is unchanged.
The right way to use the second Support activation is against big HP. Launcher Strike Gundam at HP4, a Base like Mining Asteroid Palau at HP6, or an opposing Buster Gundam sitting at AP6/HP4 with a Pilot on it — those are the targets that reward pushing your attacker past 6 AP. Bases are printed with real HP and they track damage, so an 8 AP swing genuinely matters there in a way it does not against a small Unit.
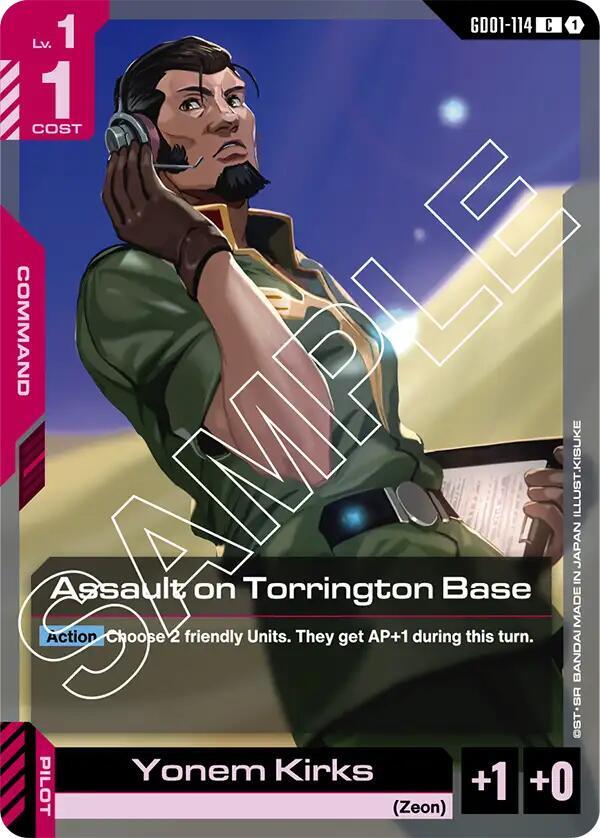
The other timing lever is Assault on Torrington Base (GD01-114), a 1-cost Red Common whose 【Action】 gives two friendly Units AP+1 with no trait restriction. Because it is Action speed, you can hold it up during your opponent's turn and use it to win a defensive block that Support cannot touch. A Rick Dias blocking at AP3 becomes AP4, which is often the difference between trading and killing outright. It also carries a 【Pilot】 line at AP+1/HP+0, so in a pinch it can be paired to a Unit instead of being cast as a Command — a flexibility that several Commands in this pool share and that the card anatomy guide walks through if the layout is new to you.
Sequencing inside your own turn is simple: deploy first, pair Pilots second, activate Support third, attack last. Support and both Pilots hand out modifiers checked when the attack happens, and Quatre Raberba Winner's rest effect changes what is legal to attack at all.
Traps, Flex Slots And Hard Limits
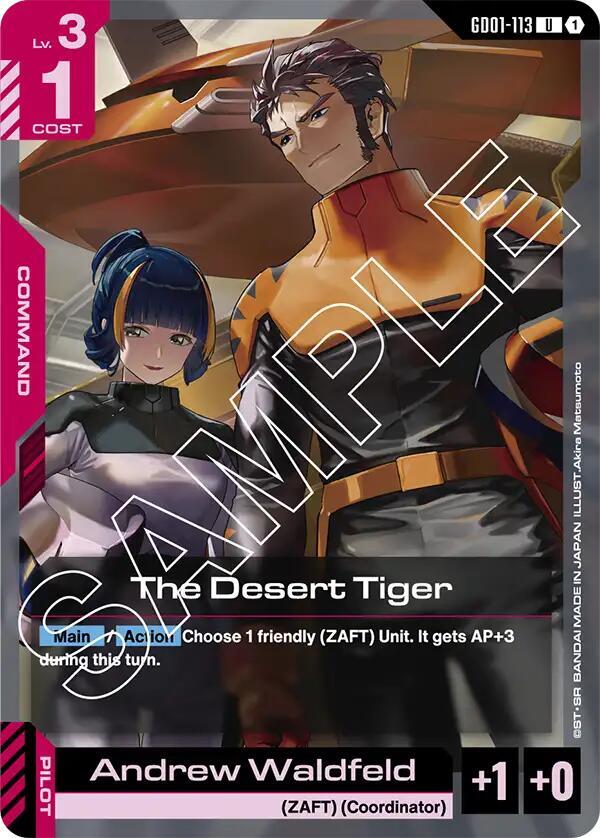
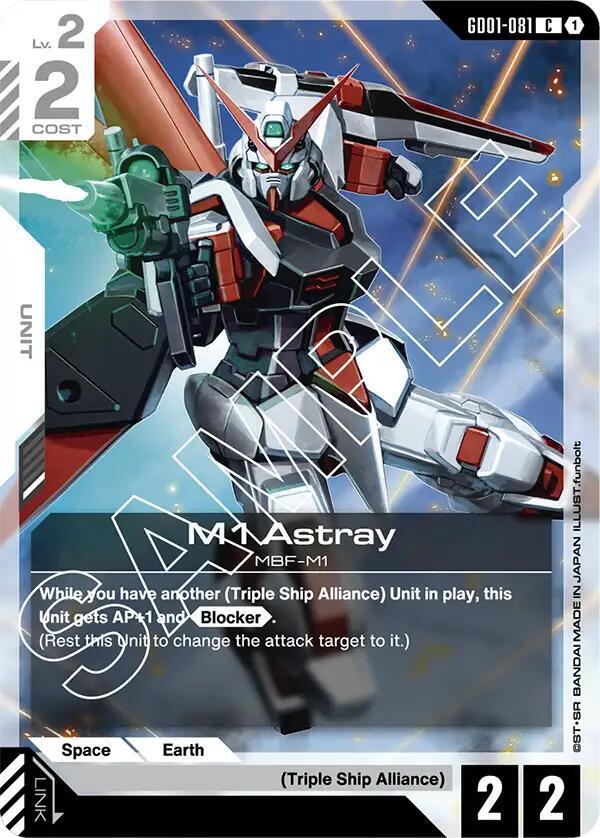
Some Red cards look like auto-includes in a Support deck and are not. The Desert Tiger (GD01-113) is the obvious one: a 1-cost Red Uncommon whose Command line pumps a friendly (ZAFT) Unit for the turn, with a 【Pilot】 line of AP+1/HP+0 if you would rather pair it instead. The problem is the trait gate. The only ZAFT Units in this build are BuCUE and ZuOOT, and ZuOOT has no AP at all to pump. Making the card good means rebuilding toward a ZAFT shell around DINN (GD01-064), a 2-cost AP3/HP2 Common, and ZnO (GD01-063), a 2-cost AP2/HP1 Uncommon with First Strike — at which point you are playing a different deck. Same story with M1 Astray (GD01-081), a 2-cost White Common at AP2/HP2: its Blocker is conditional on a trait rather than printed live at all times, and a conditional Blocker is worse than an unconditional one at the same cost. Gundam Lfrith gives you AP2/HP4 with nothing to satisfy for the same two resources.
Two more Blockers are deliberately excluded. Zowort (ST01-009) and Royal Gundam (GD05-075) are both 2-cost AP3/HP2 Blockers, and both carry the same clause: this Unit can't choose the enemy player as its attack target. In a deck that has to convert its board into shield damage before it runs out of gas, a Unit that can never attack the player is a liability. If your local meta is grindy and you want to stall harder, they are the first cards to bring in.
For flex slots, the honest shortlist is short. Galluss-K (GD01-058) is a 2-cost Red Common at AP3/HP2 whose 【Activate・Action】 ability spends a resource to pump a Unit mid-battle — useful because it works on defence, which Support does not, though the extra resource makes it clunky. Stealth Stratagem (GD01-116) deals 2 damage to an enemy Unit with 2 or less AP, which is precise removal for the enemy's own Support batteries and small Blockers. Kusanagi (GD01-129) is a 2-cost White Base with HP4 that adds a Shield to your hand and bounces a small enemy Unit on deploy, and it is a straight upgrade over Mining Asteroid Palau if you can afford the extra resource. Overflowing Affection (GD01-118) draws 2 and discards 1 for one resource, which brings us to the deck's real problem.
This deck has essentially no card advantage engine. Zero draw spells in the 50 as listed, no recursion, no way to refuel. What it has instead are three copies of Mining Asteroid Palau, whose Deploy adds a Shield to your hand, plus Burst cards that replace themselves from the shield area, which is a slower and less reliable substitute. Against another budget deck that is fine, because both of you flood out and the better curve wins. Against a built-out list with premium Rares, an eight-resource top end and real card draw, you are going to run out of cards around turn eight and lose. If you want a broader picture of where budget decks actually sit on the ladder, our beginner's guide to the meta is blunter about it than most.
The second hard limit is evasion. Nothing in this build makes an attacker unblockable, and the keyword that does — High-Maneuver — is thin and spread out rather than a Red staple: 16 printings in total, concentrated in Green, Blue and Purple. Red's share of it inside this budget pool is two cards, Gundam Ashtaron (MA Mode) (GD02-042), a 2-cost AP3/HP2 Uncommon, and Chaos Gundam (GD05-039), a 2-cost AP4/HP2 Uncommon. Both are playable two-drops, but neither replaces Schuzrum-Galluss as your Support target: at HP2 they die to counter-damage an HP3 body walks away from. So a dedicated Blocker deck can keep chump-blocking your pumped attacker, and Support does nothing about it. Quatre Raberba Winner resting a Blocker is your only real answer, and you only get two copies. Read the aggressive keywords guide if you want to understand what a deck built around actual evasion looks like.
On acquiring the cards: every slot here is a Common or Uncommon, so singles should be cheap wherever you shop. Demi Trainer and Unforeseen Incident both come out of the ST01 starter deck, the cheapest way into the game generally — our product buyer's guide compares the starters and boxes. For the rest, TCGplayer and eBay are both fine for playsets of Commons in bulk; check both, because shipping usually costs more than the cards do.
Frequently Asked Questions
What is Red's actual keyword? Support. Across all 536 cards printed so far there are exactly seven keywords in the entire game — Blocker, Breach, Repair, First Strike, High-Maneuver, Suppression and Support — and Support is the one Red owns, appearing on 9 distinct cards of which 8 are Red (89%). Red also holds the largest single share of First Strike, but that is 4 cards out of 16 printings, so it is a flavour note rather than a plan. If a guide names some other mechanic as Red's identity, it is describing a game that does not exist.
Can I use Support on my opponent's turn to save a Unit? No, and this is the single most important thing to internalise about the deck. Every Support ability in this pool is 【Activate・Main】, meaning main phase, meaning your turn. The AP+X also only lasts "during this turn," so it cannot carry over. If you need to win a combat on the defensive, you need a Blocker, Assault on Torrington Base (GD01-114) at Action speed, or Naval Bombardment (GD01-120) on a Unit that already has Blocker.
Is this deck competitive? Against other budget decks, yes — the curve is tight, the Blockers are unconditional and the Support engine wins the combats that matter. Against a fully built list with premium Rares and a real top end, no. This is an on-ramp deck that teaches you Support timing, Blocker economy and attack targeting cheaply. Anyone telling you a list of Commons and Uncommons will take down a regional is selling you something.
Why isn't Buster Gundam blocking? Because its Blocker only switches on while it has 5 or more AP, and Buster is printed at AP4. It needs a permanent source of AP, which in this list means pairing Elan Ceres (GD01-098) or Quatre Raberba Winner (GD05-100) for AP+2. A Support activation gets it to 6 AP on your turn only, and blocking happens on your opponent's turn, so Support never helps here.
What is the first upgrade when my collection grows? Card draw and a genuine top end, in that order. Overflowing Affection (GD01-118) at one resource for draw 2 discard 1 is the cheapest fix, and Kusanagi (GD01-129) upgrades your Base slot with a bounce effect attached. Beyond the budget pool, anything that makes an attacker unblockable is worth more to this shell than another Blocker, because a wall of enemy Blockers is the matchup this deck genuinely cannot solve. Our rarity guide explains which upgrade tiers cost real money and which do not.
How does the 10-card resource deck work with this list? It is separate from your 50, so there is no clever deckbuilding decision to make there at this budget level. What matters is that going second gives you an EX Resource, which effectively accelerates you a turn — meaningful for a deck with 22 one-drops and 22 two-drops, because it can mean a turn-two Buster Gundam.
Can I swap White for a different second colour? You can run any two colours you like, but you would be giving up the best part of the deck. White holds 23 of the 44 distinct Blocker cards, and Blocker is what buys the time Support needs to matter. Green would give you Breach, which it owns at 21 of 35 cards, and Blue would give you Repair at 15 of 19 — both coherent pairings for other strategies, just not for this one. Our first-deck walkthrough covers how to test a colour swap without rebuilding from scratch.
A Cheap Midrange Deck That Teaches You The Right Habits.
Red plus White at the Common and Uncommon level gives you a real deck with a real plan: rest a battery, make one attacker bigger than whatever is in front of it, and let unconditional Blockers absorb the response. It will not beat a fully upgraded list, it has no draw engine and it cannot punch through a dedicated Blocker wall — but it costs almost nothing, it plays out cleanly, and every game you win with it teaches you timing that carries into better decks.
© GEEKYDOMAIN.COM | Strategy Powered by Data